
The goal was rather quite simple here. I am working on a Kings of War Elven army to also showcase some of our excellent elven miniatures.
So of course step one was to 3d print the bases. I am really happy with this textured look sculpted by The Lion’s Tower. The cobblestone is really detailed and raised enough for the look I wanted to obtain. This was one of my quicker projects completed in just a couple hours with some cheap paints and high quality basing material.
The base sizes I am working with are the “Troop” and “Regiment” Base sizes. I will have a hordes in my list, but I can conveniently slide two regiment bases together to achieve that look. The troop variant, designed for a 10 model troop count (For infantry anyway) measures 100x40mm. You can get it here in the shop.
The regiment is essential two troop bases combined measuring 100x80mm. You can get that base here. Both base sizes have a nice indentation on the bottom to accomodate magnets. I used 10x2mm rare earth magnets which really does the trick for easy storage and transportation.
While I am intending these for Kings of War, I am sure there are plenty of other miniature wargames on the tabletop that are compatible with these sizes. Please feel free to reach out with any other games I should look into.
With all that said, let’s get into the guide for painting these up.


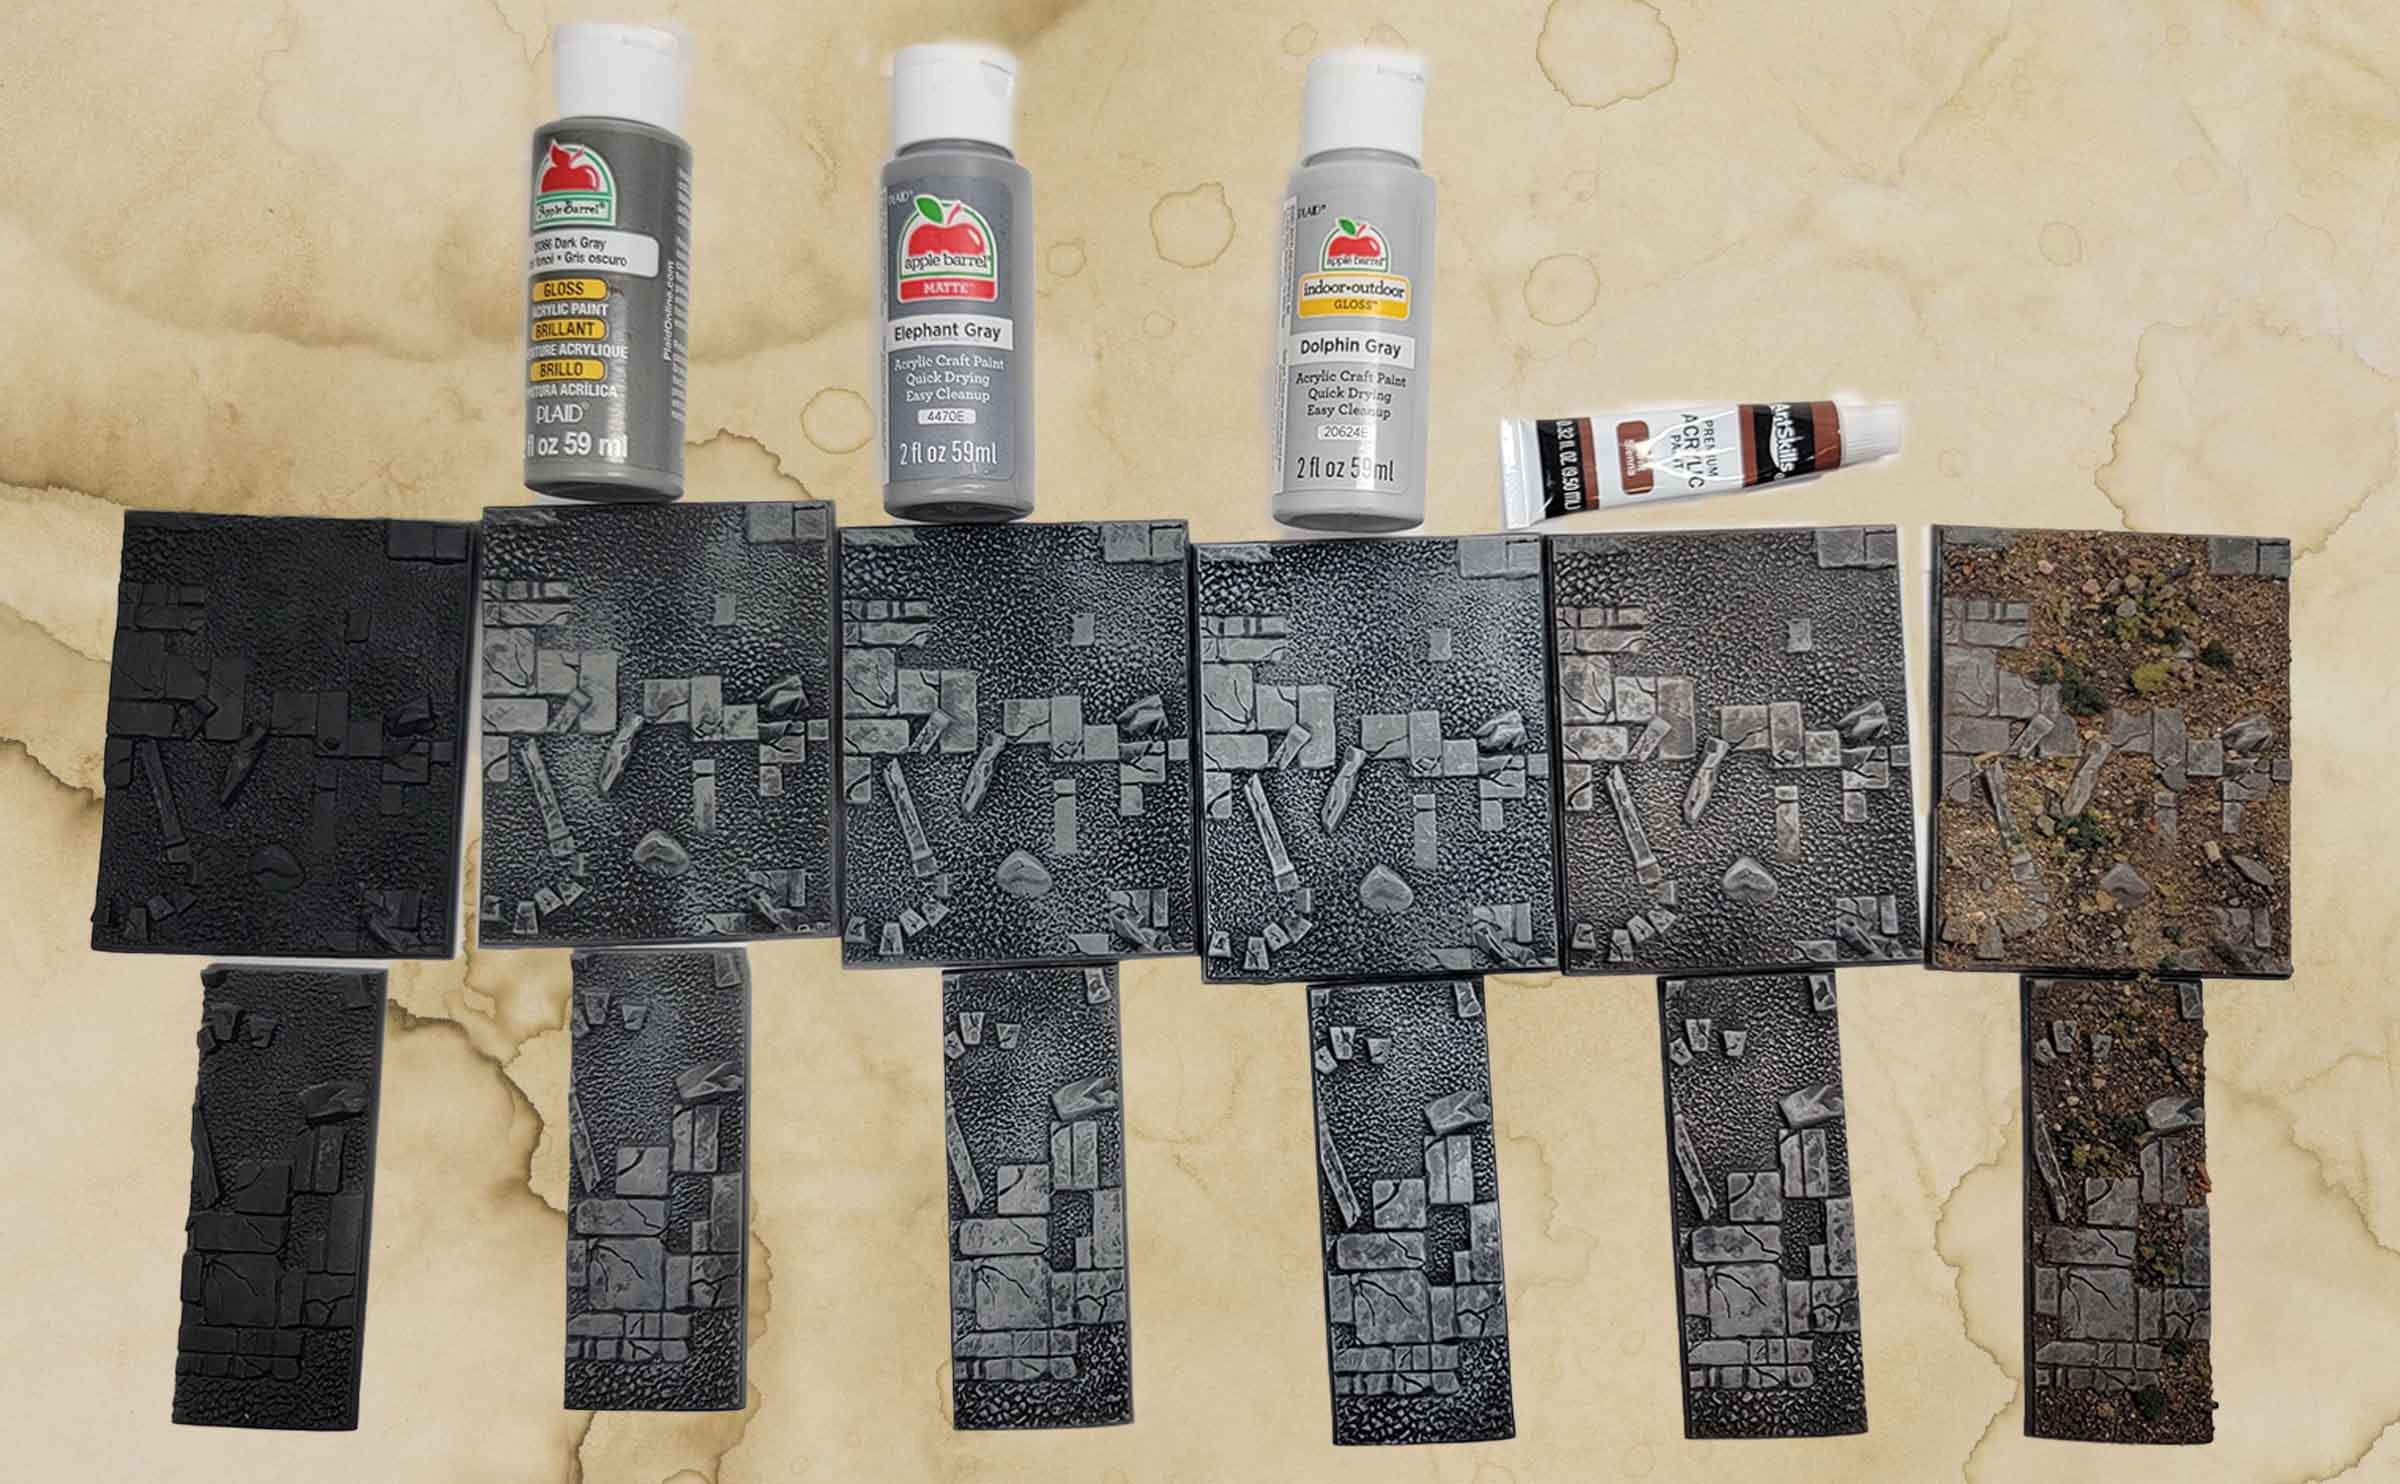
I used my airbrush to prime these black as you can see. I don’t see any issue with using your favorite brand of rattlecan paint though. Just getting the first primer layer. I do like starting with black to start dark and build up to lighter colors from here.
Already on step two and this almost looks tabletop ready as is. To acheive this look, I took the excellent, high quality, expensive Apple-Barrel paint and over brushed the “Dark Grey” color on the bases, focusing on the stoney textures. (For those who don’t know, Apple-Barrel paints are a line of fairly cheap acrylic paints. I think the quality is fine for larger things, but I personally do not use it on miniatures. I like using them on terrain or something like this where fine details are a bit less of a concern, not to mention the high cost of hobby paints for a large terrain piece would add up fast.)


Similarly to the the previous step, I went over all the bases with “Elephant Grey” which is just a shade lighter. I intentionally put less paint on the brush this time aiming for more of a dry brush rather than overbrush. With each layer, the color get lighter and the drybrushing also gets lighter as to not just paint over the previous colors.
This is the lightest shade to highlight the edges, so I went with “Dolphin Grey” and my lightest dry brushing. This looks similar to the previous step, but you will note some of the lighter areas are just a shade lighter.


Speaking of shades, I added a wash here to add a tint of brown and bring the various grey colors together. As you see in the cover image above, I used Artskills (still a cheaper brand) “Burnt Sienna” acrylic paint. To make it into a wash, I mixed a dab of paint with a ratio of about 3 parts water and 1 part paint with a drop of bubble soap liquid. (the stuff for blowing bubbles, which is basically watered down soap.) From this point, you could choose to paint the textured part that I have left mostly black through here, or add some basing material over that area.
So this kind of cheats as it was somewhat two steps, but they are essentially the same. I added a layer “Forest Ground Cover” from Geek Gaming Scenics. No sponsorship or anything, I just like their stuff. After that dried, I added some “Scrublands” basing mix in patches. I left the stonework untouched by not applying glue there. Then I spooned the basing material onto the base, and shook off the excess. Then I sparayed with a matt sealant to lock in the basing material.
